Getting Started
The target audience for this guide is a user new to Sinistral who has admin access to the Sinistral web console. This guide will explain the basic setup necessary to begin using Sinistral.
To begin, sign in to the Sinistral web console using the URL and credentials provided to you by Stacklet.
Importing policies
When you first sign in, you'll land on the Scans page, which will be empty. In order to begin scanning, you need to import some policies. Policies are YAML files that contain the rules that you want to enforce on your Terraform.
Add policy source
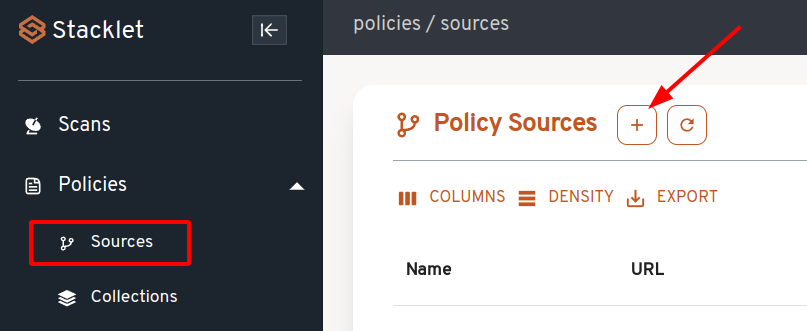
Let's import some policies from an existing git repo. Go to the Policy Sources page and click the "+" button.
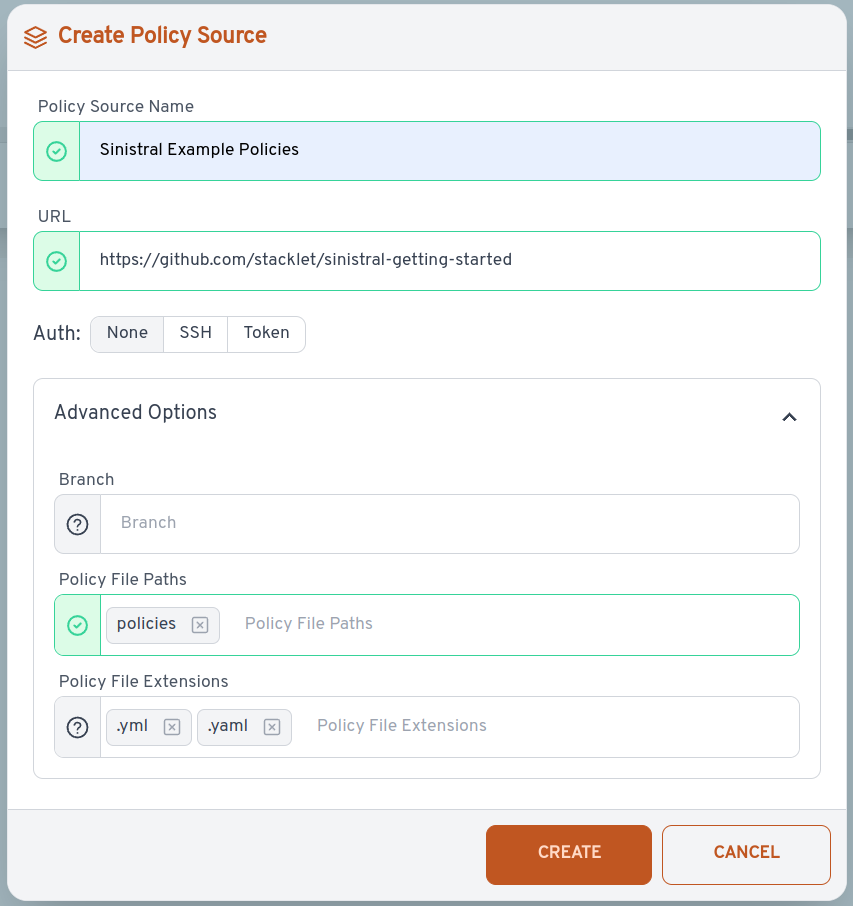
In the "Create Policy Source" dialog, enter these values, then click "Create".
- Policy Source Name - Sinistral Example Policies
- URL - https://github.com/stacklet/sinistral-getting-started
- Advanced Options - Policy File Paths - policies (make sure you hit <enter> after typing "policies")
Authentication
Sinistral supports two methods of authentication for connecting your Policy Source: SSH and HTTPS.
SSH
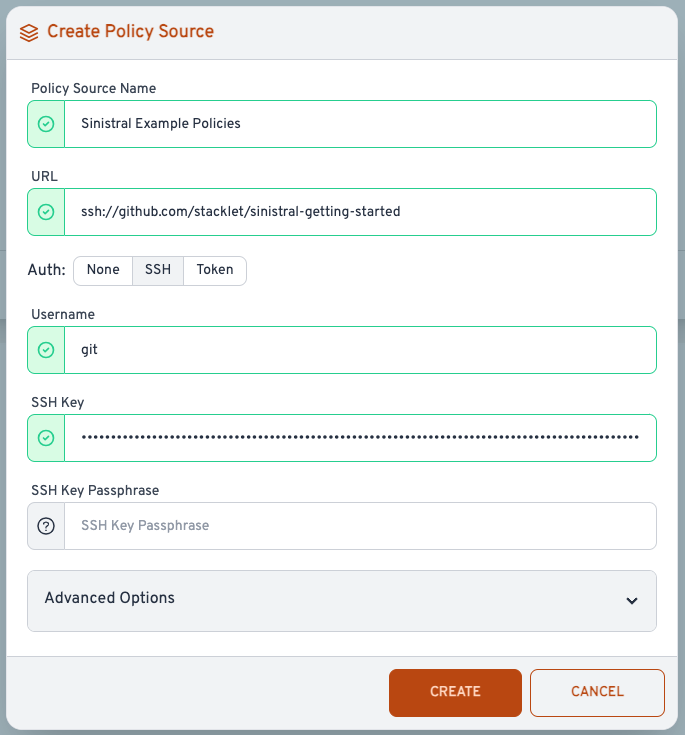
When using SSH, ensure that the Policy Source's URL matches the pattern:
Note the lack of a user git@ and the usage of /. For example, in Github the
SSH URL will go from:
to:
Next, generate a ecdsa key with ssh-keygen to connect to the repository:
Follow the steps to produce a private key and public key. Next, copy the
private key (id_ecdsa) and enter it into SSH Key field.
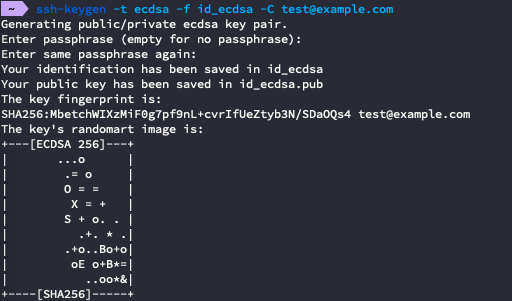
Finally, copy the public key (id_ecdsa.pub) and add it to your repository. In
Github, add a deploy token:
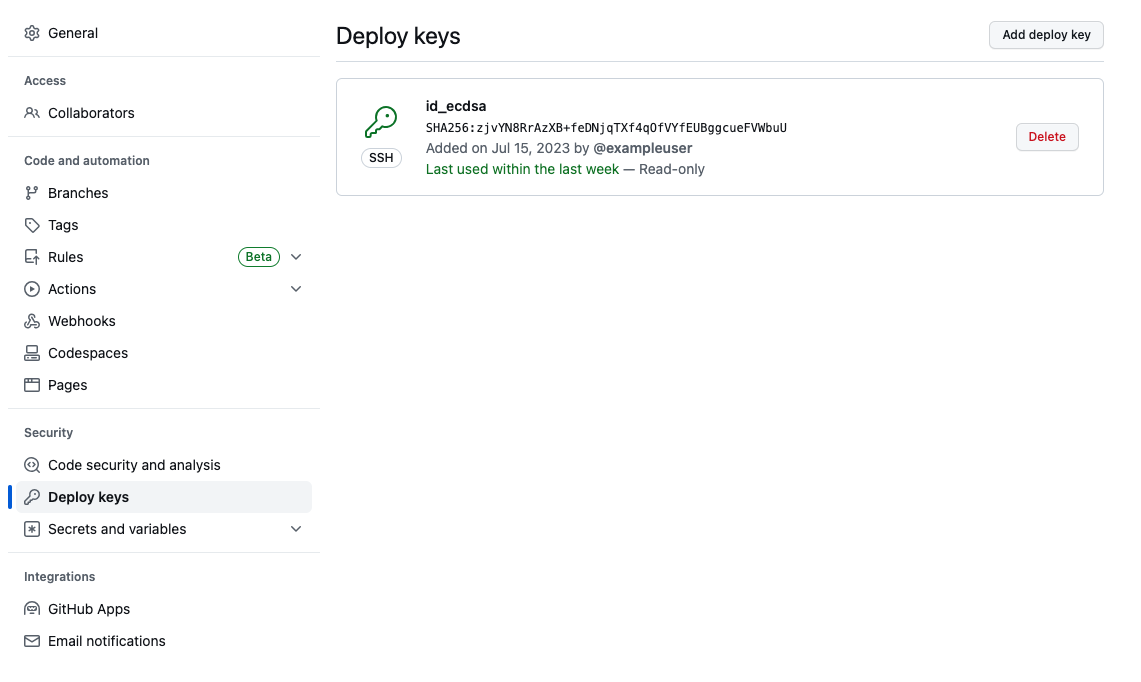
When you're done, the Policy Source should look like so:
HTTPS
When using HTTPS, ensure that the Policy Source's URL matches the pattern:
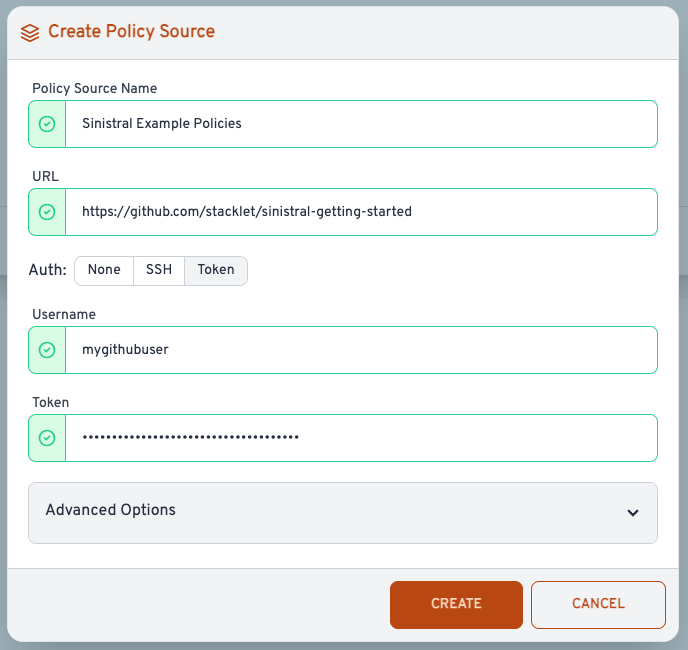
If the repository requires authentication, select "Token" and select a Username and Token.
When you're done, the Policy Source should look like so:
Scan policy repo
Click on your new Policy Source to open it.
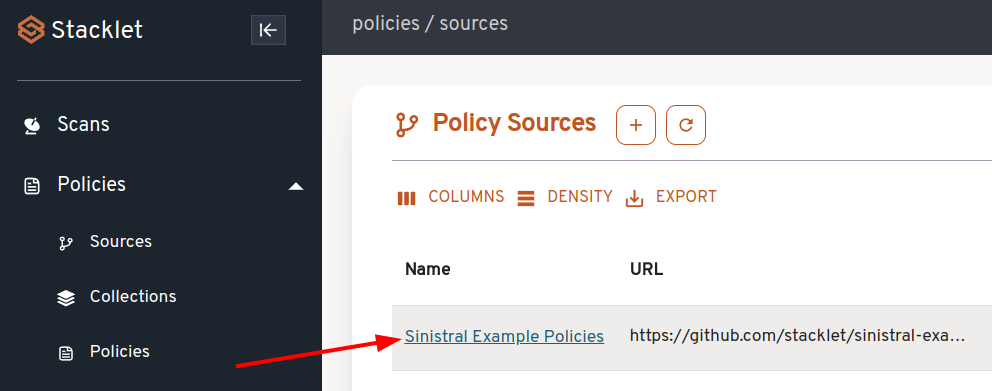
Click the "Scan Source" button.
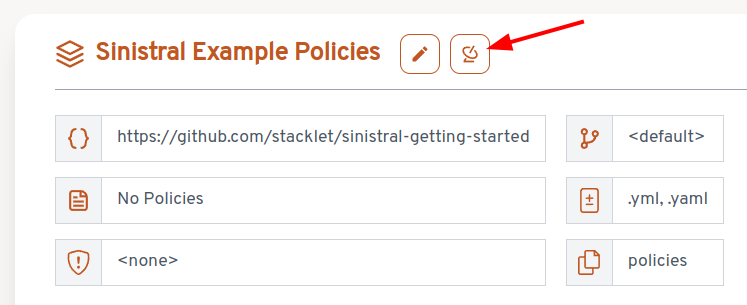
Refresh the page and you'll see that the scan has succeeded, and policies have been imported from the repo.
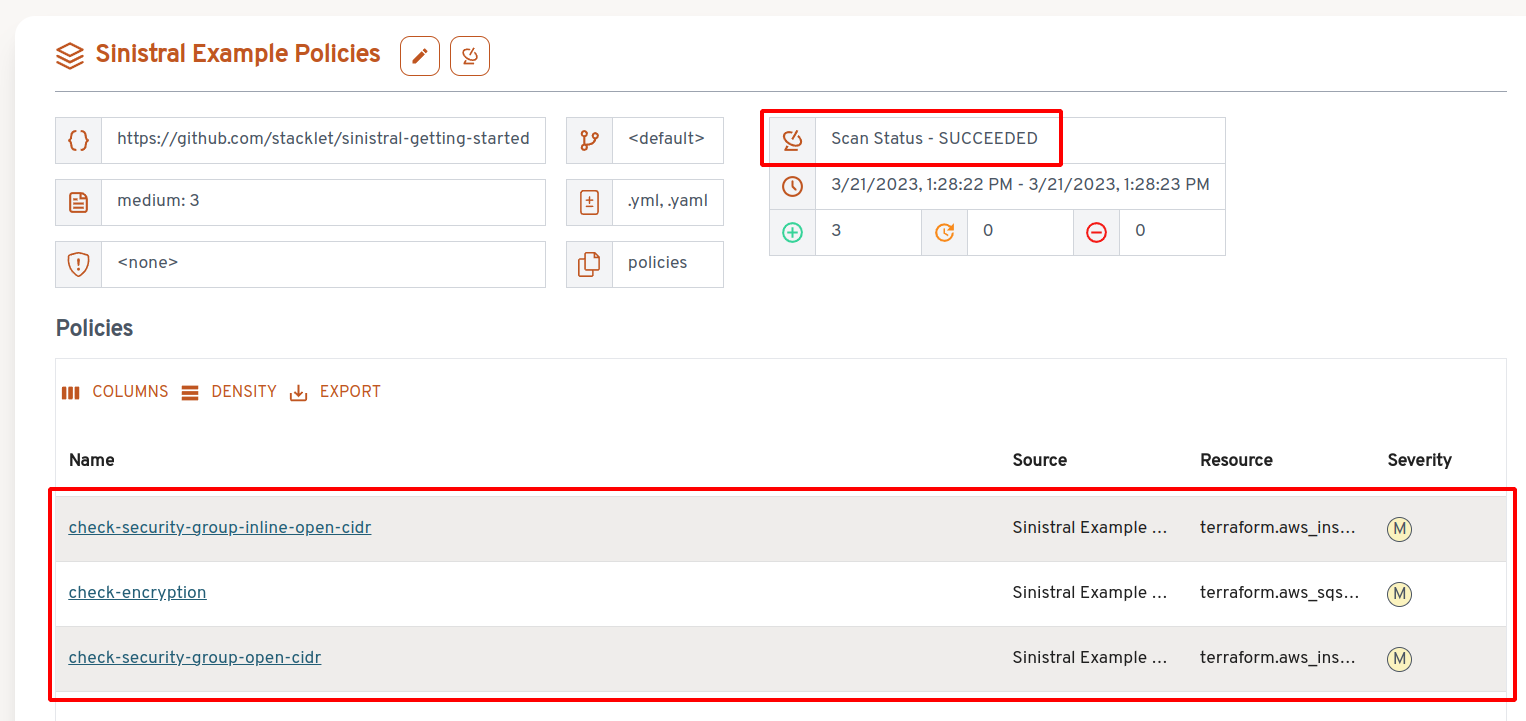
For each Policy Source, a corresponding Policy Collection is created, with a
name matching the source one, with a -mirror suffix. This collection is
automatically updated with the policies found in the repository source after
each scan (manual or automatic). It's not possible to edit mirror collections,
as they're meant to match the content of the source. Mirror collections are
also automatically removed if the corresponding source is removed.
Creating a policy collection
Go to the Policies page, select all policies and click "Add to Policy Collection".

In the dialog that opens, enter "Sinistral Example Collection" in the "Policy Collection Name" field, and click "Create".
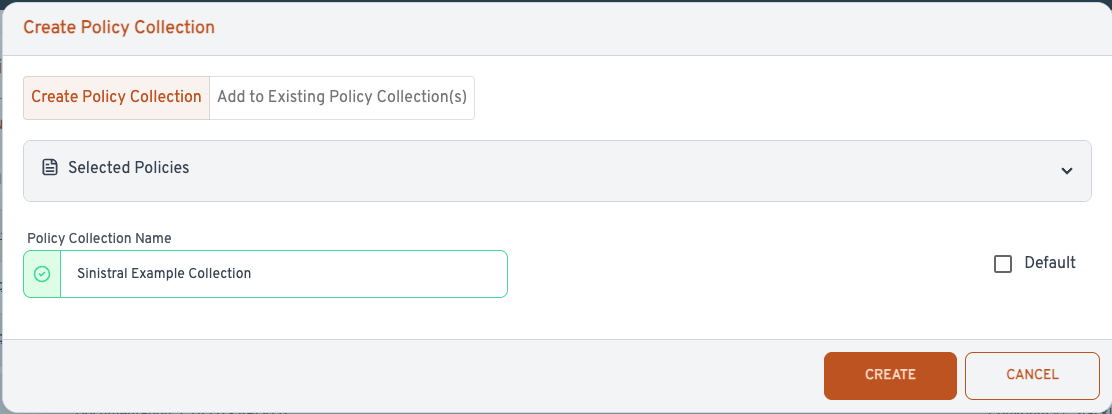
Note that you can check the "Default" box to have this Policy Collection apply to scans run for any Project that doesn't have any other Policy Collections selected. (Any Projects with explicit Policy Collection selections will ignore the default Policy Collections.)
Creating a group
Go to the Settings -> Group Management page and click "Create Group".

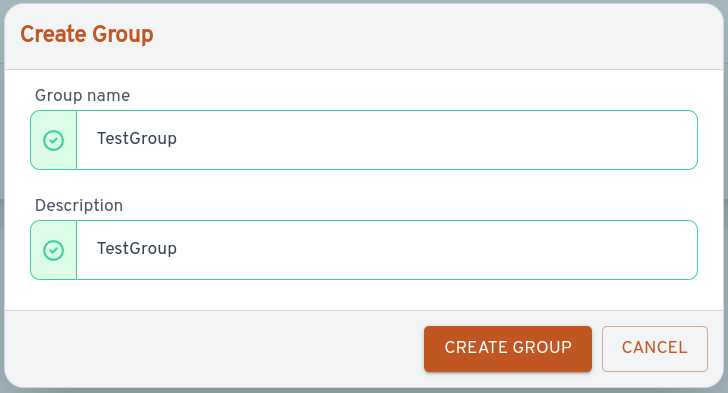
In the dialog, enter "TestGroup" in both fields (spaces are not allowed in group names) and click "Create Group".
Creating a project
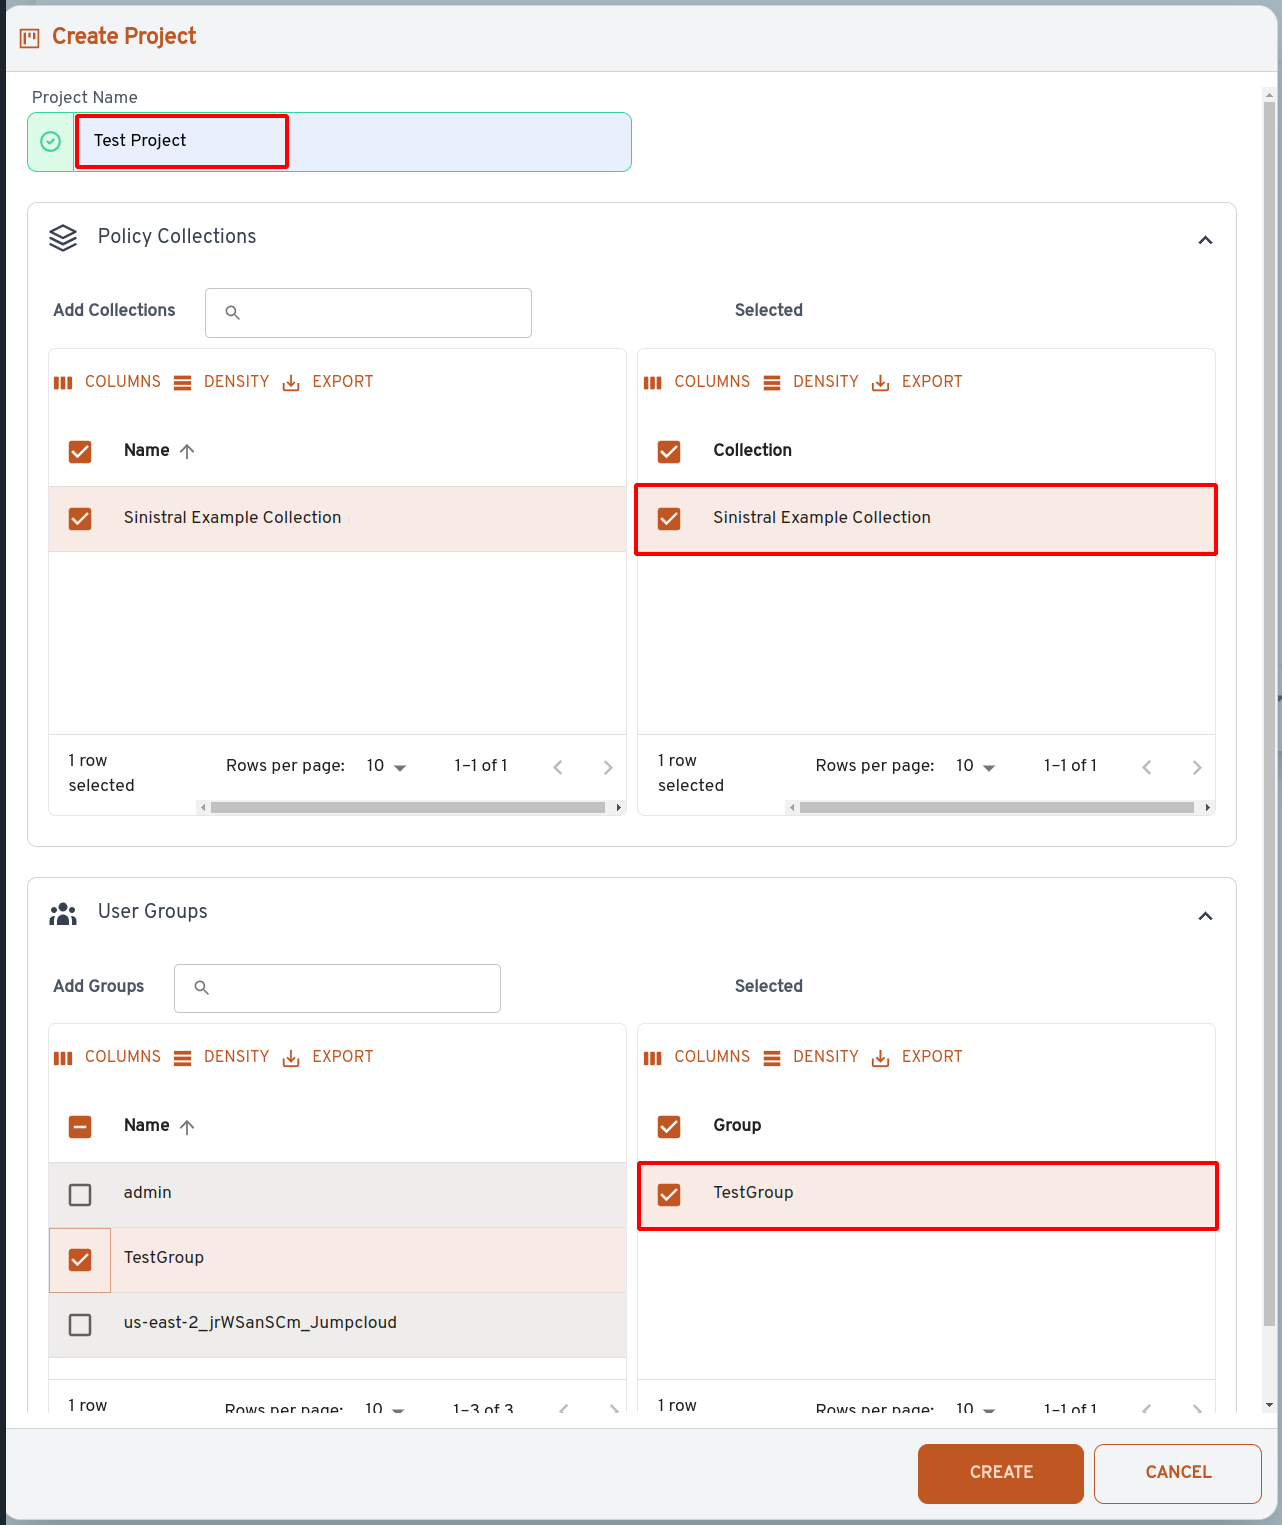
Now that we have a policy collection and group created, we can create our first project. A project defines a combination of policy collections and groups. Its usefulness will become clear when we begin scanning in the next step.
Go to the Projects page and click the Create Project button.

In the dialog, enter "Test Project" in the Project Name field. Under Policy Collections, select the "Sinistral Example Collection". Under User Groups, select the "TestGroup" that we just created. Click "Create".
Scanning Terraform
Scanning involves running the Sinistral CLI against a directory of Terraform files. The CLI publishes the scan results to the Sinistral API so that they can be viewed in the web console.
When you scan, you pass a project name to the CLI. The project tells Sinistral which policies to include in the scan, and which users are permitted to submit scan results.
Installing the CLI
In order to begin scanning, we first need to install the Sinistral CLI.
Verify that your installation succeeded by running the help command.
Configuring the CLI
Now we need to configure the CLI to talk to the API. Config options can be specified via three mechanisms: a config file, environment variables, and command-line flags. These can be mixed, with values provided via CLI flags overriding environment variables, and environment variables overriding values in the config file.
Config Directory
The location where the config file (config.json), authorization token
(credentials), and identity token (id) live defaults to
~/.stacklet/sinistral. This can be changed with the --config option, or
SINISTRAL_CONFIG environment variable. The credentials and id files will
be created automatically.
The config.json can be downloaded from the UI website:
SINISTRAL_CONFIG=~/.stacklet/sinistral
mkdir -p $SINISTRAL_CONFIG
curl -sSL https://sinistral.mycompany.stacklet.io/config/cli.json -o $SINISTRAL_CONFIG/config.json
Environment Variables
All config options can be set as environment variables, with the prefix of
SINISTRAL_. For example:
export SINISTRAL_API_URL="https://api-url/"
export SINISTRAL_AUTH_URL="https://auth-url/"
export SINISTRAL_PROJECT_CLIENT_ID="xxx"
export SINISTRAL_PROJECT_CLIENT_SECRET="yyy"
Any other command-line flags can also be set as environment variables, with additional prefixes for each of the subcommands. For example, to provide a project when creating a scan result, you can either use the CLI flag:
Or you can set it as an environment variable:
export SINISTRAL_SCANS_CREATE_PROJECT_NAME=Test

sinistral scans create --status 'PASSED' --results '[]'
Command-Line Flags
All config can also be passed directly via CLI flags. For example:
sinistral --api-url "https://api-url/" --auth-url "https://auth-url/" --project-client-id "xxx" --project-client-secret "yyy" login
Authenticating the CLI
Authentication can be done using SSO, a username and password, Project Credentials, or Organization Credentials. More information on Project and Organization credentials can be found in Using Sinistral with CI.
The default config file downloaded from the web UI can be used with either SSO, or a username and password.
Logging in with SSO is the default, if no other credentials are provided.
To login with a username and password, simply pass them in as CLI flags, or environment variables. If you provide a username but not a password, you will be prompted for the password interactively.
Verify that the CLI can talk to the API by asking for a list of available projects.
You should see results similar to this:
- client_id: 59faqv837kflfk6lpc6hoehpjb
  collections:
  - Sinistral Example Collection
  created_at: '2023-03-23T13:53:26.508295+00:00'
  groups:
    read:
    - TestGroup
  name: Test Project
  updated_at: '2023-03-23T13:53:26.508314+00:00'
Scanning locally
To demonstrate scanning, the "sinistral-getting-started" repo contains some sample Terraform files that pair nicely with the sample policies that we imported earlier.
Start by cloning the repo and cding into it.
Now we can run Sinistral against a directory of Terraform
(terraform/encryption/ in this example), using the "Test Project" that we
created.
Your results should look something like this:
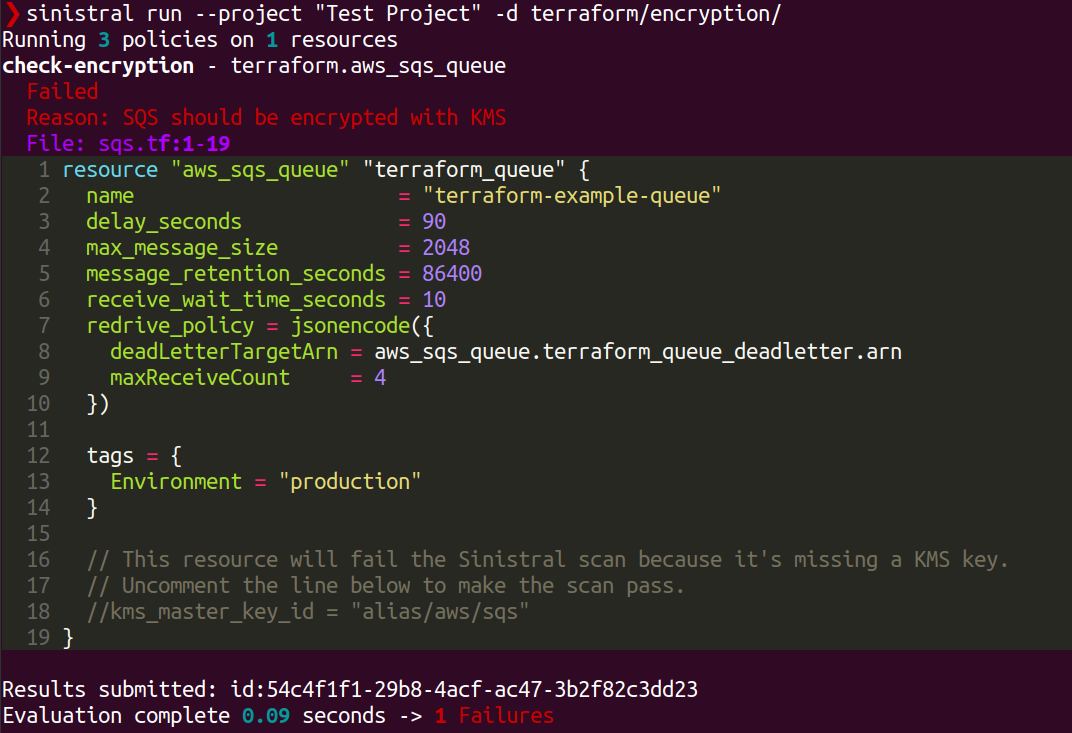
The results show that Sinistral ran 3 policies against 1 resource. The policies
are those that belong the the policy collections in our project. The resource
is the one that was found in the terraform/encryption/ directory.
The scan failed because the Terraform resource violates one of our
policies. The output shows the policy that was violated (check-encryption)
and the offending resource. There is a comment in the resource that explains
how to update it so that it will pass the scan. Try updating the resource and
rerunning the scan. If you do it correctly, your scan results will look better!

The line beginning with "Results submitted" indicates that our scan results were successfully uploaded to the Sinistral API. We can now go look at them in the web app.
Viewing results
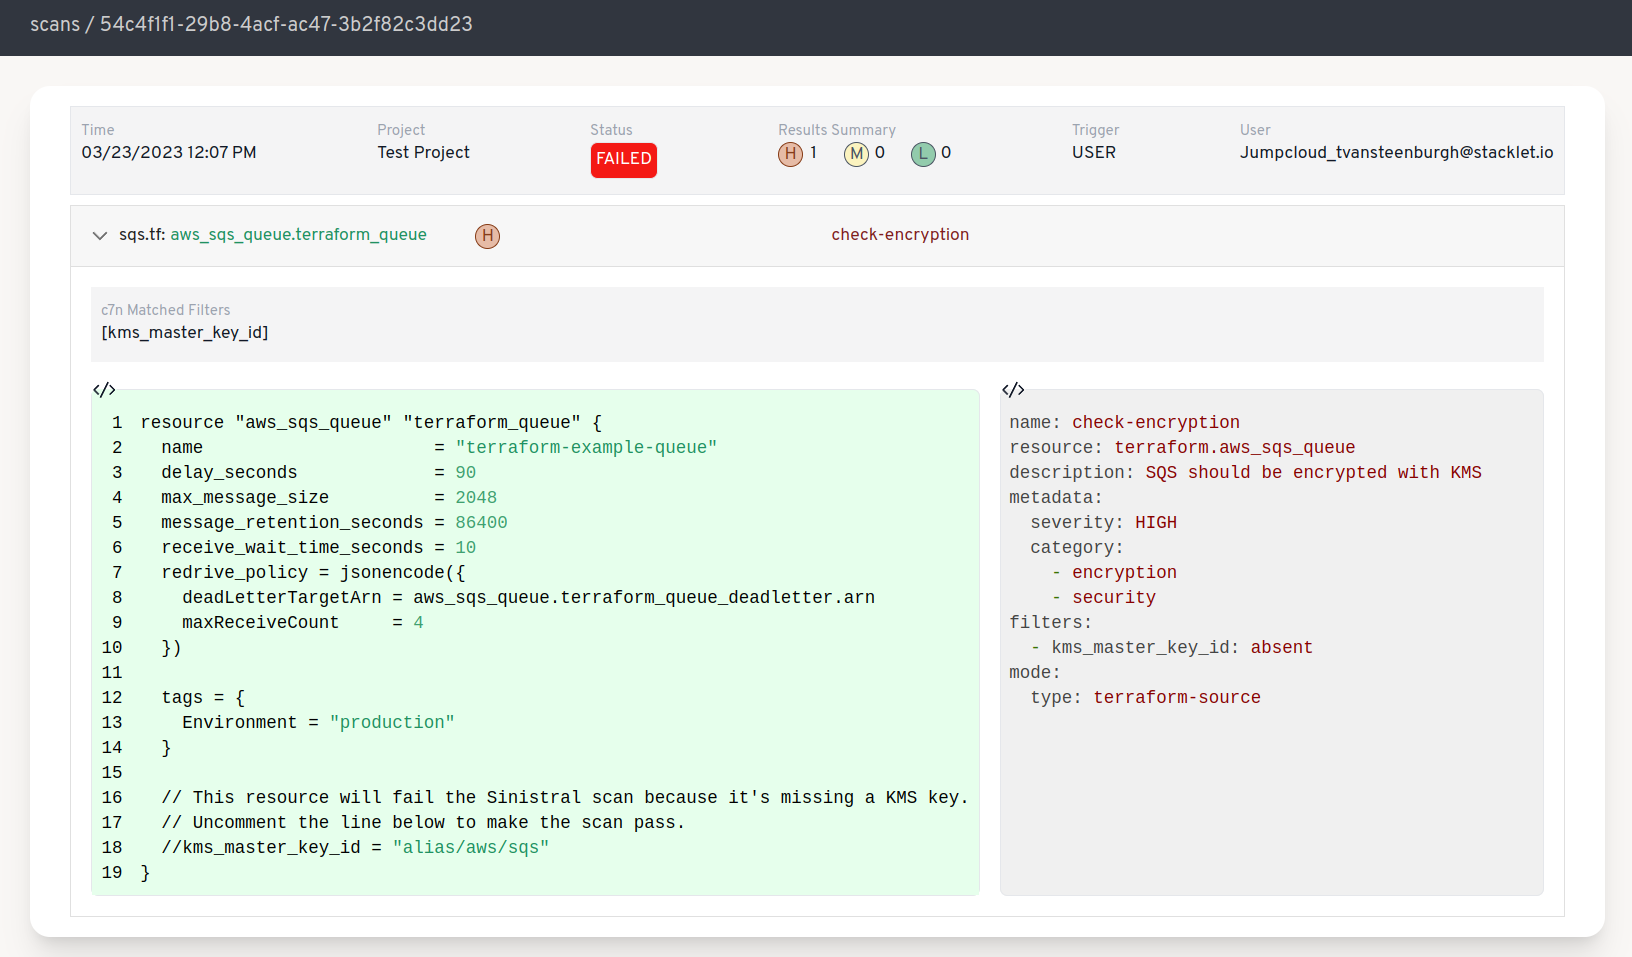
Return to the main Scans page in the web app and you'll see the results of the scans that you ran with the CLI.

Click "Detail" on a failed scan to see more info about the policies that were violated, and the offending resources.
